
Before we move onto the challenge I'd like to explain the huge changes taking place as of today. We have doubled the team size and will now be WEEKLY! Well as we're Crafty Cardmakers and tend to be a bit off road sometimes that will be weekly with a difference!
Here's how it will work!
We will post our regular challenge every other Monday as normal, you will still have 2 weeks to enter. Some of the team will show examples of their work for the challenge.
The following Monday the team will be doing a SPOTLIGHT. We may cover a style, technique, product, something specific. Now we will also be following the challenge previously posted but you may choose to do that too or have a go at just the spotlight.
For example next weeks spotlight will be on easel cards, the team have based their easels on the photo inspiraton challenge. You may choose to do this too in which case you can enter your easel into both weeks or you can enter any other easel into the spotlight only. You will also have 2 weeks to enter this until the next spotlight.

We can squarely blame Judie for this one!! I sent her off on a mission to find or photograph something to use for this challenge and this is what her crazy mind came up with lol!
If you've never done a photo inspiraton challenge before have a look through the DT examples. You can choose to have the colours as inspiration or perhaps the hearts or all of it. Choose one or two colours to focus on or all of them.

Lets have a look how the team have interpreted the photo! Some of the girls are having their first run out so lots of loves for them!
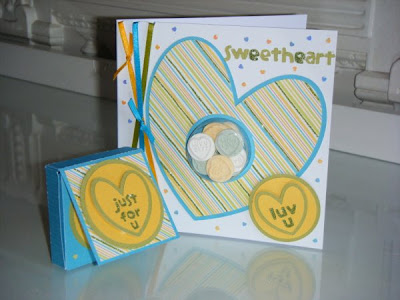

When I saw the photo I loved the colours and knew I wanted to include actual Love Hearts somehow. It’s my 21st in about a week and I’ve been given a Craft Robo as an early birthday present so thought it would be the perfect opportunity to put it through its paces. I did a quick sketch of what I wanted to create then drew the shapes in Inkscape and cut them on the Robo. After assembling the pieces using a Treat Cup from Stampin’ Up I decorated with glitter,ribbon and tiny sequin hearts.

The text (US Artquest) was stamped on glossy card with Versamark ink to get a resist effect, then heat set, followed by sponging Adirondack Meadow and Pool inks all over, then stamping the text randomly with each colour. The flourish and flowers are part of the stamp, so the little girl (Lost Coast Designs) was stamped in Permanent ink, then again on white matte card, cut out, coloured with Promarkers and the two inks, then glued her over the top of the stamped image. The flowers were coloured with Gel pens and embossed, the wings glitter glazed. The words (Paper Inspirations) were stamped on white card, cut out, layered onto black card, then attached randomly, with heart brads and gems to complete the theme.

Following instructions, I've taken my inspiration from Judie's photo and used all the duck-egg Love-Hearts from five packs (...someone ate all the others...!), a piece of Laura Ashley drawer-liner punched with a Martha Stewart border punch, topped with some Victorian wallpaper (the design, not the actual wallpaper...!) and Nestabilities Pendant die-cut. I finished it off with a MS Filigree heart punchie over a scrap of darker duck-egg paper and a small ribbon bow and silvertone heart charm.
Smells divine...!
JOY
 I used a white square card and using foam pads I fixed a coloured heart in each corner, adding another four smaller hearts under each one, I then added a circle in the centre on which I had fixed another for smaller hearts and then put a red flowery shape in the centre of it. All of the hearts are all either textured or have patterns on them which I like as I decided that it gave a bit of extra interest to the whole design. Although in fact it didn't work out the way I had thought about doing in the first place I do like the way that it's turned out.


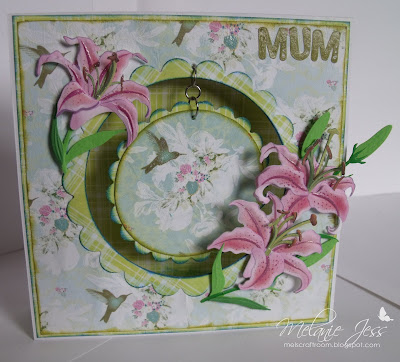
I immediately knew I wanted to use some mega cute Quickutz dies I have had for a VERY long time and I am ashamed to admit I have until now NEVER USED THEM!!
Papers are the new Papermania Summer Blooms. I used my ever faithful Martha Stewart Doily punch to cut the 'ribbon' and used a small magenta ink pad to distress the edges of all the papers and elements. The Forever Friends bear is a clear sticker. Last but not least I added some FF message stickers from Papermania which I coloured with a pink Promarker to the inside of the card.

Melly

I took inspiration from both the colours and the hearts from the photo. The image is a stamp from Victoria Case,I have coloured it with ProMarkers.I have used digital paper from Pink Petticoat for my background.To make sure it matched perfectly I opened the Inspiration photo in Paint and used the colour picker tool and picked the colour from the photo.I then used this colour to paint my Paper.The sentiment is from Craftwork Cards and the pearls,ribbon and charm are from my stash.


.JPG)
SPECIAL GUEST DESIGNER - LORI ARAGON - MY COMFORT COTTAGE
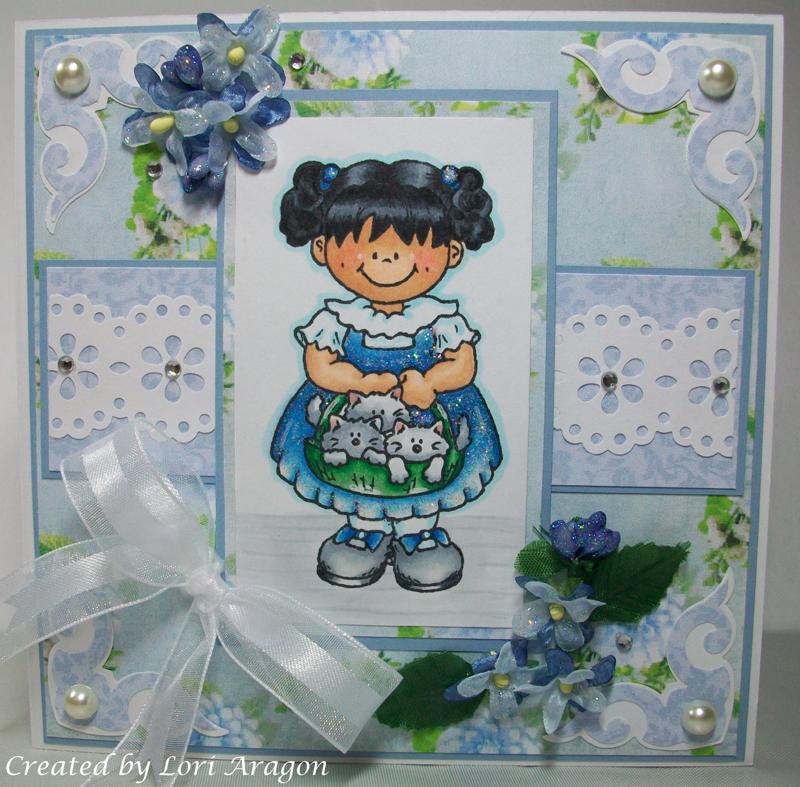
I spotted Lori's work through her entering challenges here and thought I'd ask her to be a special guest because her work is simply stunning. It has such a beautful feel to it, well planned, well coloured and with helpful write ups and ingredients lists. She is on several design teams including CLP which have some of the best designers on the planet. Pop over to Lori's blog for a real treat of such beautiful designs and pick up some helpful tips on how she makes them along the way :) Thank You Lori x
Remember you still have 2 weeks to enter but pop back to join in the spotlight next week too!
The DT team has made wonderful cards!
ReplyDeletexxx Margreet
What an interesting challenge, I will have to give this a bit of a think before I start, love the range of examples from the DT and GD Lori
ReplyDeleteTricky one!!! Hope you can see the likeness in my card! I used the colour and shape... if you stand back n squint ;) xo
ReplyDeleteGORGEOUS work ladies!!! I've been out of town - my post is up : )
ReplyDeleteLove and big hugs ~
Lori
Congrats to the DT on their fabulous cards! Thanks for the inspiration x
ReplyDeleteGreat challenge it made you think. I went with the colors. The DT did a wonderful job.
ReplyDeleteThank you Cor* for the suggestion to join in with this challenge, hope thats ok, Debbiexx
ReplyDelete